

A desire to breathe new life into your living space, a canvas awaiting your creative strokes. As you dream up the perfect decor changes, a common dilemma surfaces for those with security systems. In this case, removing this is necessary. How to remove an alarm sensor for decorating without compromising your home’s safety net?
The process involves a series of careful steps. From disarming and powering down the system to gently removing the sensor cover, disconnecting wires (if applicable), and notifying the monitoring service, each action contributes to a smooth transition.
In this guide, I’ll discuss the process, offering straightforward steps and solutions when you can’t. So read the entire article carefully from top to bottom.
Steps To Remove Alarm Sensor For Decorating:
Preparing to decorate while maintaining home security involves navigating the intricacies of alarm sensors. This guide outlines steps to safely remove these sensors, allowing for a seamless decorating experience without compromising your security system’s effectiveness.
Step 1: Understand The System
Understanding your alarm system is the foundational step before attempting any modifications. It involves familiarizing yourself with the type of system you have, its components, and how it operates.
Begin by carefully reviewing your alarm system’s user manual to grasp its components and operations. Identify the specific sensor to be removed, such as door/window contacts or motion detectors. Distinguish between hardwired and wireless systems, noting wiring connections or communication protocols.
Confirm compatibility and alarm-triggering mechanisms, understanding the impact of sensor removal. Learn the disarm procedures to prevent accidental alarms. Adhere to system-specific guidelines. If uncertain, consult professionals or the service provider to ensure a safe and informed approach to decorating while temporarily disabling the sensor.
Step 2: Notify The Monitoring Service
Inform the alarm system’s monitoring service about your intention to disable a sensor for decorating purposes temporarily. This crucial step prevents false alarms and potential dispatch of emergency services. Provide specific details about the sensor you’re removing and the expected duration of its inactivity.
Clear communication with the monitoring service ensures they are aware of the adjustment in the system. Failure to notify them may lead to unnecessary interventions and complications. This underscores the importance of proactive communication in maintaining the effectiveness of the alarm system during the decorating process.
Step 3: Locate the Sensor
Identify the precise location of the sensor slated for removal. Reference the user manual or documentation for guidance on sensor placement within your security system. Common sensor locations include doors, windows, or specific zones within a room.
Visually inspect the area to locate the sensor device, which might be a discreet unit or integrated into door/window frames. Take note of any covers or casings, as these may need to be removed for access.
Clear identification ensures a targeted approach during the subsequent steps. It promotes efficiency and minimizes the risk of unintended interference with other components of the alarm system.
Step 4: Power Down The System
Before manipulating the sensor, initiate a controlled shutdown of the alarm system to prevent inadvertent triggering or false alarms. Access the control panel or use a key fob to disarm the system. Confirm the system’s status indicator shows disarmed.
If your system includes a power switch, turn it off to ensure complete deactivation. This precautionary measure ensures a safe environment for sensor removal and minimizes disruptions to the monitoring service. Maintain system integrity by following the shutdown procedures outlined in the user manual, reducing the risk of accidental alarms.
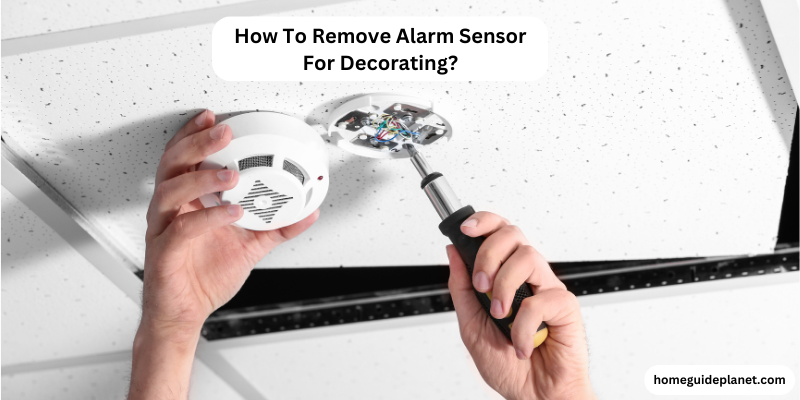
Step 5: Remove The Sensor Cover
Once the system is powered down, proceed to uncover the sensor. Depending on the model, the cover may be a snap-on casing or secured with screws. Refer to the user manual for guidance.
Use the appropriate tools, such as a screwdriver, to carefully detach the cover without causing damage. Be cautious to avoid disrupting internal components. If the cover is sealed, follow any specific instructions provided by the manufacturer.
Uncovering the sensor provides access for subsequent steps and ensures a meticulous approach to both removal and, later, reinstallation. Keep track of any removed screws or parts for seamless reassembly when decorating is complete.
Step 6: Disconnect Wires (If Applicable)
If your alarm system is hardwired, the next step is to disconnect the sensor wires. Identify the wires connected to the sensor by referring to the user manual or any labeling present. Before proceeding, confirm that the system remains powered down to ensure safety during wire manipulation.
Using appropriate tools, such as wire strippers or pliers, carefully detach the wires from the sensor terminals. Take note of each wire’s placement, as they may be color-coded or labeled.
This step is crucial for maintaining the sensor’s integrity during removal and streamlining the reconnection process after decorating is complete. Exercise care to avoid damaging the wires or the sensor housing.
Step 7: Disable Wireless Sensors (If Applicable)
For wireless alarm systems, disabling the sensor involves accessing the system’s control panel or interface. Begin by powering down the system to prevent accidental alarms during this process.
Navigate to the system’s user interface, often found on a control panel or accessible through a mobile app.
Locate the section related to sensor management or devices. Identify the wireless sensor slated for removal and follow the system-specific procedure to disable or disconnect it.
This may involve selecting the sensor in the interface and choosing a disable or disconnect option. Ensure that the system acknowledges the sensor’s disabled status before decorating, maintaining a seamless and secure transition.
Step 8: Label And Document
After disconnecting or disabling the sensor, ensure a smooth reinstallation process by labeling wires (if applicable), documenting the sensor’s location, and optionally taking photographs for reference.
This meticulous approach streamlines the decorating process and minimizes the risk of errors during reconnection. Store any removed screws or parts in a labeled container, and cross-reference your documentation with the user manual to align with manufacturer instructions.
This organized documentation not only aids in efficient reinstallation but also serves as a valuable reference in case of future adjustments or maintenance, maintaining the integrity of your alarm system.
Step 9: Decorate
Now that the sensor is safely disconnected or disabled, proceed with your decorating plans. Whether it’s painting, rearranging, or any other modifications, work confidently knowing that the alarm system won’t be triggered during this period.
Take care not to damage the sensor or its components during the decorating process. With the area transformed to your liking, you’re ready for the next steps in the reinstallation process.
As you work, keep your labeled components and documentation easily accessible to facilitate a seamless transition when it’s time to reconnect the sensor to the alarm system.
Step 10: Reconnect And Test
Having completed your decorating tasks, it’s time to reconnect the sensor to the alarm system. If you disconnect wires, carefully attach them to their designated terminals, following the labeled information. Reenable wireless sensors through the system’s control panel or interface.
Power up the alarm system and conduct a thorough test to ensure the sensor functions correctly. Confirm that the system acknowledges the reconnection without triggering false alarms. This step ensures the restored functionality of the security system, maintaining its effectiveness post-decorating.
Step 11: Notify The Monitoring Service
After successfully reconnecting the sensor, promptly notify the alarm system’s monitoring service. Inform them that the decorating process is complete, and the sensor is now active. Clear communication ensures the monitoring service is aware of the system’s restored status.
Confirm with the service that they have received the update and that the security system is functioning as expected. This final step solidifies the integrity of your alarm system and its communication with the monitoring service, maintaining the effectiveness of your home security.
What If You Can’t Remove The Alarm Sensor For Decorating:
If you find it challenging or impossible to remove an alarm sensor for decorating, there are alternative strategies to consider:
Consult With Alarm System Provider:
Contact your alarm system provider or the company responsible for its installation. They may guide how to temporarily disable or work around the specific sensor without compromising security.
Professional Assistance:
Hire a professional alarm system technician to assist with the temporary deactivation or relocation of the sensor. They have the expertise to manage the system without causing any issues.
Temporary Sensor Covering:
If the sensor is small, consider covering it temporarily with a non-permanent material such as painter’s tape or a removable adhesive. Ensure that the covering doesn’t obstruct the sensor’s functionality.
Adjust Decorating Plans:
Modify your decorating plans to work around the sensor’s location. This might involve focusing on other areas or aspects of the space that don’t directly interfere with the sensor.
Postpone Sensor Adjustment:
If all else fails, consider postponing the adjustment of the sensor until a more convenient time. Focus on other aspects of the decorating process that won’t interfere with the alarm system.
Related Questions:
Can You Remove A Sensor On Alarm System?
It is often possible to remove a sensor from an alarm system, especially for temporary purposes such as decorating. To do so, follow the proper procedures outlined in the system’s user manual. This typically involves disarming the system, removing the sensor cover, and disconnecting wires if it’s a hardwired sensor.
It’s essential to inform the monitoring service in advance and follow all safety precautions. If uncertain, consider seeking professional assistance to ensure the security system remains intact and functional.
How Do You Remove Old Motion Sensors From Alarm?
To remove old motion sensors from an alarm system, start by powering down the entire system. Disarm the alarm using the provided code or key fob and ensure the system is fully powered down to avoid accidental alarms during removal. Once the system is disarmed, locate the specific motion sensor you wish to remove.
Carefully remove the sensor cover, using appropriate tools to prevent any damage. For hardwired sensors, disconnect the wires, noting their positions for future reference. If the sensors are wireless, access the system interface to disable them. Always notify the monitoring service before making any changes to maintain the system’s integrity.
Can You Remove An Alarm Sensor For Decorating Purposes?
You can often remove an alarm sensor for decorating purposes. Begin by disarming and powering down the alarm system following the user manual’s instructions. Locate the specific sensor, remove its cover, and, if applicable, disconnect any wires or disable wireless functionality.
It’s crucial to notify the monitoring service beforehand to prevent false alarms. Exercise caution, follow proper procedures, and, if uncertain, consider seeking professional assistance to ensure the security system remains intact and functional during and after the decorating process.
Can You Remove An Alarm Sensor From The Wall?
You can remove an alarm sensor from the wall. Begin by disarming and powering down the alarm system. Gently detach the sensor cover and, if applicable, disconnect any wires. Most sensors are mounted using screws, so use a suitable screwdriver to remove them.
Exercise caution to avoid damaging the sensor or wall. Once the screws are removed, carefully take the sensor off the wall. If uncertain, consult the user manual or seek professional assistance. Remember to inform the monitoring service before any removal and follow safety guidelines for a smooth process.
How Do You Test The System After Reconnecting The Sensor?
To test the alarm system after reconnecting the sensor, power up the system and ensure the sensor is correctly reconnected. Trigger the sensor by simulating the conditions it’s designed to detect, such as movement for a motion sensor.
Confirm that the system acknowledges the activation without triggering false alarms. Also, check the system’s status indicators and monitor any notifications from the control panel or app. Conducting a thorough test ensures the proper functionality of the reconnected sensor and the overall security system.
Is It Necessary To Power Down The Entire Alarm System Before Removing A Sensor?
It is crucial to power down the entire alarm system before removing a sensor. Disarming the system alone may not be sufficient, as some sensors may remain active. Full system power-down minimizes the risk of triggering false alarms during the removal process.
In addition, it ensures a safe environment for both the user and the security system. Always follow the procedures outlined in the user manual to disarm and power down the system completely before attempting to remove any sensors.
What Precautions Should You Take When Removing The Sensor Cover?
When removing the sensor cover, exercise caution by using appropriate tools and following the guidelines outlined in the user manual. Gentle handling is essential to avoid damage to the cover or internal components. Furthermore, refer to the proper instructions for specific guidelines on proper cover removal.
Take note of surrounding components to prevent accidental damage during the process. Furthermore, ensure the entire alarm system is disarmed and powered down to minimize the risk of triggering false alarms while maintaining a safe environment for both the user and the security system.
Conclusion:
Successfully removing an alarm sensor for decorating demands meticulous planning and adherence to safety protocols. By understanding your system, notifying the monitoring service, and executing precise removal steps, you can balance aesthetic goals with security needs. Hope, the guide on how to remove the alarm sensor for decorating purposes helps you a lot. Follow the process and if required, seek help from an expert.
Recent Posts
Do you think about building home theater columns yourself? It’s an effortless DIY project if you have basic knowledge and patience. A home theater column increases the visual appeal and audio...
Do you want to give your floors a sleek and resilient makeover without breaking the bank? The answer lies in Invincible Vinyl Flooring! Installing Invincible Vinyl Flooring is not just a practical...
One thought on “How To Remove Alarm Sensor For Decorating?[Explained]”