

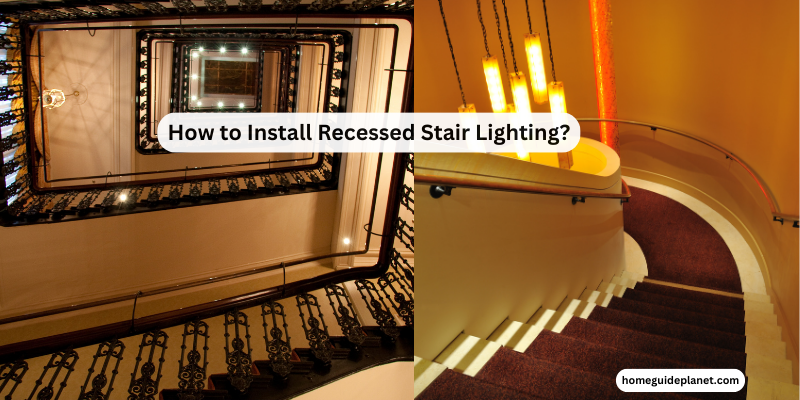
Recessed stair lighting not only enhances the aesthetic appeal of your staircase but also provides safety and functionality to your home. Whether you want to create a dramatic ambiance or improve visibility in a dark stairwell, installing recessed stair lighting is a great DIY project.
To install recessed stair lighting, gather materials, plan layout, turn off power, drill holes, install junction boxes, run wiring, connect lights, secure fixtures, and restore power safely for a well-lit and stylish staircase.
In this step-by-step article, I will walk you through the process of installing recessed stair lighting to transform your staircase into a well-lit and stylish focal point. You will also be enlightened with some common queries.
Tools:
Electrical junction box
Cable staples
Screwdriver
Wire stripper
Drill
Circuit tester
Materials:
Recessed LED stairlights
Electrical wire
Wire connectors
Hole saw
Measuring tape
Pencil
Safety glasses
Timing:
May take several hours to a full day.
9 Steps of Installing Recessed Stair Lighting:
Follow these 9 essential steps for installing recessed stair lighting and you will discover your staircase with a stunning glow!
Step 1: Gather Your Materials:
Before you begin, it’s essential to gather all the necessary materials and tools. You will need:
Ensure that you choose LED lights designed for stair applications, as they are energy-efficient and durable.
Step 2: Plan Your Lighting Layout:
Carefully plan the layout of your recessed stair lighting. Measure the distance between each step and mark the desired locations for your lights. Ensure that the spacing is even and that the lights are centered on each step for uniform illumination.
Step 3: Turn Off Power:
Safety should be a top priority when working with electricity. Turn off the power to the area where you will be installing the lights at your electrical panel. Verify that the power is off using a circuit tester.
Step 4: Drill Holes for the Lights:
Use a hole saw to drill holes in each marked location for the lights. Make sure the holes are deep enough to accommodate the recessed light fixtures.
Step 5: Install Junction Boxes:
Attach electrical junction boxes near the top of your stairs. These boxes will serve as connection points for the lights. Secure them to the wall using screws and ensure they are level.
Step 6: Run Electrical Wiring:
Run electrical wire from the junction boxes to each drilled hole for the lights. Leave enough slack to connect the lights without straining the wires. Use cable staples to secure the wire along the wall or under the stairs.
Step 7: Connect the Lights:
Connect the electrical wires to the recessed LED stairlights according to the manufacturer’s instructions. Usually, this involves connecting the black (hot) wire to the black wire and the white (neutral) wire to the white wire. Secure the connections with wire connectors.
Step 8: Install the Lights:
Insert the lights into the drilled holes, ensuring they fit snugly. Most recessed LED stairlights come with spring clips that hold them in place. Push the clips outward to secure the fixtures within the holes.
Step 9: Restore Power:
Once all the lights are installed and properly connected, turn the power back on at the electrical panel. Test each light to make sure it illuminates correctly.
7 Important Tips About Installation Recessed Stair Lighting:
Certainly, here are a few additional tips to keep in mind when installing recessed stair lighting:
Choose the Right Lights:
Select LED lights with the appropriate brightness and color temperature for your staircase. Warm white or cool white LEDs are common choices, but it depends on your design preferences.
Consider Motion Sensors:
For added convenience and energy efficiency, you can install motion sensors that activate the lights when someone approaches the stairs and turn them off after a period of inactivity.
Use a Level:
Ensure that your lights and junction boxes are level during installation to maintain a clean and professional look.
Weatherproof Lights:
If you plan to install recessed stair lighting outdoors, make sure the lights are rated for outdoor use and are adequately sealed to withstand the elements.
Wire Management:
Keep wires neatly organized and secured along the staircase to prevent tripping hazards and maintain a tidy appearance.
Test Before Finalizing:
Test all the lights and connections before securing them in their final positions to identify and address any issues early in the installation process.
Consult a Professional:
If you are uncomfortable with any aspect of the electrical work or have doubts about the installation, it’s always wise to consult with a licensed electrician to ensure safety and compliance with local codes.
10 Things To Avoid While Installing Recessed Stair Lighting
Avoiding common mistakes during the installation of recessed stair lighting is crucial for a safe and aesthetically pleasing outcome. Here are some key mistakes to steer clear of:
Skipping Electrical Safety:
Failing to turn off the power at the electrical panel before starting work can result in dangerous electrical shocks. Always prioritize safety by shutting off the power and using a circuit tester to confirm it’s off.
Inadequate Planning:
Poor planning can lead to uneven lighting, unattractive layouts, or incorrect spacing between lights. Measure and plan your layout meticulously before drilling any holes.
Incorrect Wiring:
Using the wrong type of electrical wire, improper connections, or failing to secure wires properly can lead to electrical issues or hazards. Always follow electrical codes and guidelines.
Improper Hole Sizing:
Drilling holes that are too large or too small for the recessed lights can lead to difficulties during installation or poor fit, compromising the finished look.
Overlooking Water Resistance:
If installing lights outdoors or in damp areas, using non-weatherproof lights or failing to seal connections adequately can lead to corrosion and malfunctions.
Neglecting Light Quality:
Choosing lights without considering their brightness, color temperature, or dimming options can result in an unsatisfactory lighting experience.
Rushing the Installation:
Taking shortcuts or rushing through the installation can lead to mistakes and an unsatisfactory outcome. Take your time to ensure each step is done correctly.
Ignoring Local Codes:
Failing to adhere to local electrical codes and regulations can result in safety hazards and potential legal issues. Always research and follow your area’s electrical requirements.
Forgetting About Maintenance:
Recessed lights may require occasional maintenance. Failing to consider accessibility for future maintenance can lead to difficulties when replacements or repairs are needed.
Not Testing Before Finishing:
Before finalizing the installation, test all lights to ensure they work correctly. Fix any issues or malfunctions before sealing the lights in place.
FAQ:
What types of lights are suitable for recessed stair lighting?
LED lights are the most suitable choice for recessed stair lighting. They are energy-efficient, long-lasting, and produce minimal heat, making them safe for installation in confined spaces like staircases.
How do I determine the spacing between recessed stair lights?
Spacing between lights should be even and typically ranges from 1.5 to 2 feet apart, depending on the staircase’s width and the desired level of illumination. Plan your layout carefully to achieve uniform lighting.
Can I install recessed stair lighting myself?
Yes, it’s a DIY-friendly project for those with basic electrical skills. However, if you’re unsure about electrical work, consult a professional electrician for safety and compliance.
Do I need special weatherproof lights for outdoor staircases?
Yes, for outdoor applications, use lights specifically designed to withstand moisture and environmental factors. These lights are sealed to prevent water ingress and corrosion.
Can I install dimmer switches for my recessed stair lights?
Yes, you can install dimmer switches to control the brightness and create different lighting moods. Ensure the lights are compatible with dimmer switches.
What tools are essential for recessed stair lighting installation?
You’ll need a drill, hole saw, screwdriver, wire stripper, measuring tape, safety glasses, and a circuit tester. Additionally, have cable staples and wire connectors on hand.
Are there motion-sensing options for recessed stair lighting?
Yes, motion sensors can be integrated to activate the lights when motion is detected. This adds convenience and enhances energy efficiency.
How do I maintain recessed stair lights?
Routine maintenance includes cleaning lenses and checking for loose connections. Accessible fixtures are easier to maintain, so plan for accessibility during installation.
Can I retrofit the existing stairs with recessed lighting?
Yes, you can retrofit existing staircases with recessed lighting, but it may require more effort and modification than installing during construction.
What’s the lifespan of LED recessed stair lights?
LED lights have a long lifespan, typically ranging from 25,000 to 50,000 hours or more, depending on the quality and usage. This means they can last for many years before needing replacement.
Conclusion
Installing recessed stair lighting is a rewarding DIY project that can enhance both the safety and aesthetics of your home.
By following this step-by-step guide, you can transform your staircase into a beautifully lit focal point that adds both style and functionality to your living space.
Always prioritize safety when working with electricity, and consult a professional electrician if you are unsure about any aspect of the installation process. With the right tools and materials, your well-lit staircase will be a source of pride for your home.
Recent Posts
Do you think about building home theater columns yourself? It’s an effortless DIY project if you have basic knowledge and patience. A home theater column increases the visual appeal and audio...
Do you want to give your floors a sleek and resilient makeover without breaking the bank? The answer lies in Invincible Vinyl Flooring! Installing Invincible Vinyl Flooring is not just a practical...
One thought on “How to Install Recessed Stair Lighting?[Safely & stylishly]”