

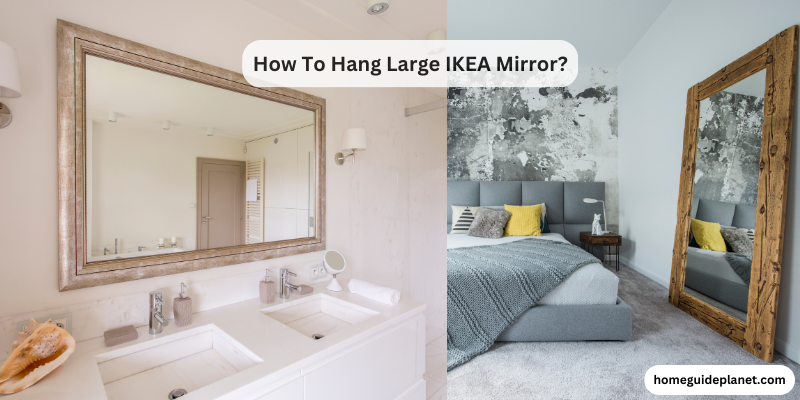
Wondering how to hang a large IKEA mirror? Whether you’re looking to brighten up a space or add a stylish touch to your home, hanging a large mirror can be a transformative and practical choice. The process will be effortless if you follow the right process. So how to hang a large IKEA mirror in your home?
The process of hanging a large IKEA mirror involves choosing a suitable method, such as using a mirror hanging kit, heavy-duty hangers, a French cleat system, or adhesive strips. Key considerations include weight capacity, wall type, and precise measurements.
Keep reading this article. In this article, I’ll show you the process and some effective methods to choose from. Also, you’ll learn the key considerations to finish successfully.
Different Methods To Hang Large Ikea Mirrors:
Method 1: Mirror Hanging Kits
Mirror hanging kits are specialized hardware packages designed by IKEA to securely mount their mirrors on walls. These kits typically include a set of brackets, screws, and other necessary components, all specifically chosen to accommodate the dimensions and weight of IKEA mirrors.
The brackets provided in these kits are designed to fit seamlessly with the structure of IKEA mirrors, ensuring a secure and stable attachment. Instructions are usually included to guide users through the installation process, making it accessible for individuals with varying levels of DIY experience.
Key Benefits:
- Tailored Design:
Mirror hanging kits are customized to match the dimensions and structure of IKEA mirrors. This ensures a precise fit and reduces the risk of compatibility issues during installation.
- Comprehensive Hardware:
The kits come with all the essential hardware needed for mounting the mirror. This includes brackets, screws, and potentially wall anchors, eliminating the need for users to source individual components.
- Ease of Installation:
With detailed and user-friendly instructions, mirror hanging kits simplify the installation process. Despite not having extensive DIY experience, it is accessible even to beginners.
Method 2: Heavy-Duty Mirror Hangers
Heavy-duty mirror hangers are robust hardware solutions designed to provide strong support for large and heavy mirrors. These hangers typically consist of durable materials and are adjustable to accommodate various mirror sizes and weights.
The design often includes a system where the hangers attach to the back of the mirror, distributing the weight evenly. Also, these hangers may have features that allow for adjustment, making them versatile for different mirror dimensions.
Key Benefits:
- Strong Support:
Heavy-duty mirror hangers are engineered to offer robust support, making them ideal for mirrors with considerable weight. This ensures the mirror remains securely mounted without the risk of sagging or instability.
- Adjustability:
Many heavy-duty hangers are adjustable, allowing users to customize the fit based on the size and weight of the mirror. This versatility makes them suitable for a wide range of mirror dimensions.
- Ease of Installation:
Generally, heavy-duty mirror hangers are designed for straightforward installation. They often come with user-friendly features, such as adjustable brackets, making the process accessible for individuals with varying levels of DIY experience.
Method 3: French Cleat System
The French cleat system is a versatile and secure method for hanging large items, including mirrors. It involves using a pair of interlocking brackets, typically made in a wedge-like shape, one attached to the mirror and the other to the wall. This creates a strong connection that evenly distributes the weight of the mirror.
The cleats can be adjusted for a secure fit, and their interlocking design provides stability and prevents the mirror from shifting. This system is commonly used for heavy mirrors and offers the flexibility to easily remove and reposition the mirror if needed.
Key Benefits:
- Stability:
The French cleat system offers excellent stability by distributing the weight of the mirror evenly across the cleats. This reduces the risk of sagging or tilting over time.
- Easy Removal And Repositioning:
The cleats allow for easy removal and repositioning of the mirror. This is advantageous for cleaning, adjusting the mirror’s position, or if you need to relocate the mirror to another wall.
- Flush Mounting:
The French cleat system allows the mirror to be mounted flush against the wall, providing a clean and professional appearance without visible hardware.
Method 4: Wall Anchors And Screws
Using wall anchors and screws is a versatile and common method for hanging mirrors. Wall anchors provide additional support by distributing the weight across a larger surface area within the wall. This method is suitable for various wall types, including drywall and plaster.
To implement this method, screws are driven through the mirror’s brackets or mounting points and into the wall, with wall anchors serving as support and reinforcement. The choice of wall anchors and screws depends on the weight of the mirror and the type of wall.
Key Benefits:
- Versatility:
Wall anchors and screws are versatile and can be used with different wall types, making them a practical choice for various households.
- Cost-Effective:
This method is relatively inexpensive, and the required hardware is readily available at most hardware stores. It provides a cost-effective solution for securely hanging mirrors.
- Weight Range:
Depending on the type of wall anchors and screws used, this method can support a range of mirror sizes and weights, making it suitable for a variety of mirrors.
Method 5: Cleat And Frame System
The cleat and frame system combines the stability of a cleat with the added support of a frame around the mirror. The cleat is attached to the wall, and a corresponding cleat is affixed to the back of the mirror frame. This method is especially suitable for mirrors with frames, providing a stable and secure mounting solution.
The frame not only enhances the aesthetics but also serves as additional support for the mirror. It allows for a secure connection between the mirror and the wall, distributing the weight evenly.
Key Benefits:
- Stable Support:
The combination of the cleat and frame provides stable and even support for the mirror. This is particularly beneficial for mirrors with added weight due to a frame.
- Ease of Installation:
The installation process is relatively straightforward, especially if the mirror already has a compatible frame. Attaching the cleat to the wall and the corresponding cleat to the mirror frame simplifies the mounting process.
Method 6: Adhesive Strips Or Hooks
The use of adhesive strips or hooks is a straightforward and drill-free method for hanging mirrors. This method involves attaching adhesive strips or hooks to the back of the mirror, and then affixing them directly to the wall. Adhesive hanging solutions are designed to provide a strong bond while minimizing damage to the wall surface.
Adhesive strips or hooks are commonly chosen for their simplicity and ease of use. They are suitable for mirrors with a lighter weight and are often preferred in situations where drilling into the wall is not desirable, such as in rental properties.
Key Benefits:
- Simplicity:
The installation process is simple and quick. It typically involves cleaning the surfaces, attaching the adhesive strips or hooks to the mirror, and then firmly pressing the mirror onto the wall.
- Low Damage:
Adhesive solutions minimize damage to walls since they eliminate the need for drilling. This makes them a suitable option for renters or those who wish to avoid creating holes in the wall.
- Minimal Tools Required:
This method requires minimal tools, making it accessible for individuals who may not have access to a wide range of hardware or prefer a tool-free installation.
10 Steps To Hang Large IKEA Mirror:
Step 1: Gather Materials And Tools
Collect all necessary materials, including the IKEA mirror hanging kit or suitable hardware such as heavy-duty mirror hangers, wall anchors, screws, a level, a measuring tape, and a pencil.
Step 2: Choose The Hanging Method
Decide on the hanging method based on the mirror type and your wall. Options include using an IKEA mirror hanging kit, heavy-duty mirror hangers, a French cleat system, wall anchors and screws, a cleat and frame system, or adhesive strips or hooks.
Step 3: Measure And Mark
Measure the dimensions of the mirror and use the measurements to determine the ideal placement on the wall. Mark the desired hanging location with a pencil, ensuring the mirror is level.
Step 4: Prepare The Wall
If using wall anchors and screws, identify the type of wall (drywall, plaster, etc.) and select appropriate anchors. Install the anchors according to the manufacturer’s instructions. For other methods, ensure the wall is clean and free from debris.
Step 5: Attach Brackets Or Cleats
Depending on the chosen method, attach the brackets, cleats, or other mounting hardware to both the mirror and the wall. Follow the provided instructions carefully, ensuring a secure connection.
Step 6: Hang The Mirror
Lift the mirror and hang it on the wall-mounted hardware. For methods like the French cleat system or cleat and frame system, ensure that the cleats interlock securely. Use a level to double-check that the mirror is straight and aligned.
Step 7: Adjust And Secure
If applicable, make any necessary adjustments to ensure the mirror is level and secure. Tighten screws, adjust brackets, or make any modifications needed for stability.
Step 8: Test Stability
Gently shake or tap the mirror to ensure it is securely fastened. If using adhesive strips or hooks, follow any recommended waiting periods before applying pressure to the mirror.
Step 9: Clean And Enjoy
Wipe down the mirror to remove fingerprints or smudges. Step back and admire your securely and beautifully hung IKEA mirror.
Step 10: Safety Check
Periodically check the mirror to ensure it remains securely fastened to the wall. If any adjustments are needed, address them promptly to maintain stability.
Key Considerations When Hanging A Large Ikea Mirror:
Weight Capacity:
Verify the weight capacity of the chosen hanging method, whether it’s a kit, hangers, cleats, or adhesive strips. Ensure that the selected hardware can adequately support the weight of your specific mirror.
Wall Type:
Different walls require different hanging methods. Drywall, plaster, and concrete walls may need specific anchors or screws. Confirm compatibility with your wall type to ensure a secure mount.
Wall Studs:
If using screws and anchors, locate and secure the mirror to wall studs whenever possible. This provides a more stable foundation than just anchoring into drywall.
Measurement Accuracy:
Take precise measurements: Accurate measurements are crucial for proper alignment. Ensure that the hanging hardware is placed at the correct height and level to achieve the desired positioning.
Installation Method:
Consider the available options based on the mirror’s design and your preferences. Some mirrors come with recommended hanging kits, while others may benefit from heavy-duty hangers, a cleat system, or adhesive solutions.
Mirror Attachment Points:
Check mirror attachment points: Ensure that the mirror has appropriate attachments or a secure frame if using hangers or cleats. The chosen hardware relies on a solid connection to the mirror for effective support.
Aesthetic Preferences:
Different hanging methods have varying levels of visibility. Some methods, like adhesive strips or hooks, may be less visually intrusive, while others, such as brackets or cleats, may be visible. Choose a method that aligns with your aesthetic preferences.
Long-term Reliability:
For adhesive solutions, consider the long-term reliability, especially in varying environmental conditions. Some adhesives may weaken over time, affecting the stability of the mirror.
Safety Checks:
Periodically check the mirror to ensure it remains securely fastened to the wall. If there are any signs of instability or adjustments needed, address them promptly.
Related Questions:
Can You Stick An IKEA Mirror On The Wall?
You can stick an IKEA mirror on the wall using adhesive strips or hooks. IKEA provides adhesive solutions for many of its mirrors, allowing for easy and drill-free installation. Simply clean the wall, attach the provided adhesive strips or hooks to the back of the mirror, and press it firmly onto the wall.
Ensure to follow the manufacturer’s instructions for the specific adhesive product to guarantee a secure and reliable mount. This method is particularly suitable for mirrors with a lighter weight.
Can You Add A DIY Wood Frame With IKEA Mirrors While Hanging?
You can enhance the look of an IKEA mirror by adding a DIY wood frame. Start by measuring and cutting wooden molding or boards to match the mirror’s dimensions, ensuring neatly mitered corners. Customize the frame with paint or stain to suit your decor.
Attach the frame securely using wood glue or screws. Once it’s dry, hang the framed mirror on the wall using an appropriate method. This simple DIY project not only adds a personal touch but also transforms the mirror into a stylish and customized piece that complements your home decor.
Do IKEA Mirrors Come With Screws?
IKEA mirrors may come with screws and other necessary hardware included. The specific contents of the package can vary depending on the mirror model and its intended installation method. To ensure you have all the required components, it’s recommended to check the product description, packaging, or any included assembly instructions.
If screws are not included or you need additional hardware for your specific mounting requirements, you can purchase them separately from a hardware store or use those from your existing toolkit.
Can You Hang An IKEA Mirror With Command Strips?
You can hang an IKEA mirror using Command Strips. Ensure the mirror’s weight falls within the specified capacity of the Command Strips you choose. Clean the wall surface and the back of the mirror with rubbing alcohol.
Apply the Command Strips to the mirror and press firmly onto the wall, following the package instructions. Command Strips provide a secure and damage-free mounting option, particularly suitable for lightweight IKEA mirrors and when avoiding drilling holes in the wall is desired.
Conclusion:
Hanging a large IKEA mirror offers numerous possibilities, and the method chosen depends on factors. Before installation, careful planning, precise measurements, and adherence to weight capacities are essential. By considering some factors, you can achieve a secure, aesthetically pleasing, and personalized display of an IKEA mirror in any space.
Recent Posts
Do you think about building home theater columns yourself? It’s an effortless DIY project if you have basic knowledge and patience. A home theater column increases the visual appeal and audio...
Do you want to give your floors a sleek and resilient makeover without breaking the bank? The answer lies in Invincible Vinyl Flooring! Installing Invincible Vinyl Flooring is not just a practical...
One thought on “How To Hang Large IKEA Mirror?[Methods And Procee]”