

Avoiding shadows is the biggest challenge in photography. Photographers have to work hard to get the picture out of the shadows. However, if you do not know how to get rid of shadows with lighting, all your efforts will be in vain.
In photography, I’ve had a lot of issues with lighting without shadow. However, I’ve managed to fix it effectively. I’ll share my lighting experience with you to help you get rid of shadows. You won’t be able to learn as much technique anywhere else.
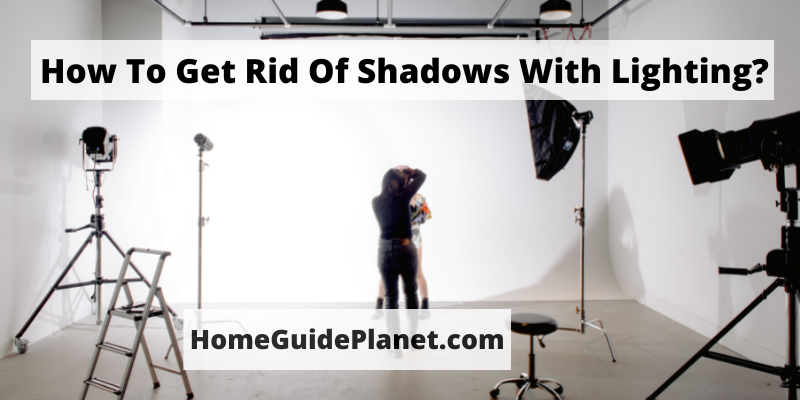
This article will be an ideal guideline to get rid of shadows with lighting. You will find ins and outs about lighting that require knowing shadow-free lighting.
7 Steps To Get Rid Of Shadows With Lighting: Do It Perfectly
You can take different steps to get rid of shadows with lighting. Although these things depend on space and time, below I have described in general how to get rid of shadows with lighting. Let’s see:
Step-1: Set The Camera In Manual Mode
You can manage the depth of field in manual mode. So, keep the camera shutter in Manual Mode. Set the camera shutter speed to less than 1/60. In this, you will get relief from The interference caused by artificial light. You can capture pictures without any ambiguity.
On the other hand, if the shutter speed of your camera is more than 1/200, artificial light will still cause problems when capturing pictures. When the shutter speed is high, blue and orange are captured as bars. Fluorescent lights cause more problems with this speed of the shutter.
Step-2: Understand Your Camera
You need to know your camera well to get the perfect shadow-free picture with your camera. Each camera has its unique features and limitations. So, know well about the ISO settings of your camera. Know about the timing of granular shots. Identify the other factors which change exposure and limitation.
Step-3: Keep The Lights High
Keep lights high during photography. Even if it is a shadow, it will be at the bottom. For example, if the sun is over your head, you will not see your shadow. Keep more light in your set. Having more light will result in less shadow. It will get rid of shadows in the image during lighting.
Step-4: Use The Reflector
To get rid of shadows with lighting, the reflector is an essential tool. The reflector works well even in a bad light. The light falls on the reflector and spreads around. As a result, shadows cannot be created. However, you need to place the reflector on top.
The larger the reflector, the more light can be scattered. Make sure your reflector is white. White color can scatter more light. You can use foil paper to make the reflector. It is better if the shape of the reflector is round.
Step-5: Use The Diffuser Lighting
Many recessed lighting fixtures currently have a frosted shield over the bulbs that diffuses light. This is exactly required to get rid of shadows with lighting. If you’re utilizing lamps to supplement recessed lighting in a space, use lamp coverings that spread light as well.
Step-6: Stand In The Correct Position
Standing in the right position will have a great effect on the lighting. If there is light behind you, the shadow will be created during lighting. However, you need to be in a position where there is no shadow. You can try several times to know the correct position.
Step-7: Shoot With A Tripod
Get rid of shadows with lighting and you can use a tripod. A tripod is a good helper for any environment. You can easily observe the shadows by using a tripod during lighting. With a tripod, you can easily adjust the shadows. A good quality image depends on combining light and shadow during lighting.
6 Mind-Blowing Idea Of Shadow-Free Lighting: For Creative Photographer
It is very difficult to get a shadow-free environment during lighting. Still, I’ll share some ideas here. You can do shadow-free lighting by following this idea:
Idea-1: Two Lights Rather Than One
One of the best ways is to use two lights on either side of your object during lighting. Even if you do not use other lights, shadow-free lighting is still possible using this method. Set the two lights on either side of the object so that they are at equal distances.
Idea-2: Lighting In Daylight
You will get a better image by using daylight lighting. Daylight is brighter than your camera flash. So it is better to do it in the afternoon without capturing the image at noon. You can also capture the image using the light that comes when you open the window of your house. In this case, you have to place your desired object properly in front of daylight.
Idea-3: Lighting Using Transparent Surface
You use transparent surfaces when product photography. Light is reflected on the transparent surface. This reflected light makes it brighter after the object. As a result, you will be able to do shadow-free lighting. You can use glass for a transparent surface.
Idea-4: Shadow-Free Lighting Using Ambient Light
If there is light in front of the object, it will create a shadow behind it. Again, if there is light in the back, shadow will be created in the front. So keep the light in a position that wraps around the object. As a result, less shadow will be created during lighting.
Idea-5: Turn Off-Camera Flash
Many times camera flash creates shadow during lighting. Even if there is no shadow in your set, there may be shadows on the opposite side due to the camera flash. If you think there is enough light in the photography set, keep the camera flash off.
Idea-6: Use Flash Mount Ceiling Lights
Ceiling lights are an excellent way to spread light evenly in a room. If you use a flush mount ceiling light, you will get a shadow-free image during lighting. However, your ceiling must be high enough to use this light.
5 Useful Lighting Tips To Get Rid Of Shadows: Effective Tips
You can do shadow-free lighting by following the steps described above. Follow the tips below for more excellent shadow-free lighting.
Tip-1: Choose Light Colors For The Walls
The walls of the photography room should not be dark. Dark colors enhance the shadow in the room. When the color of the wall is light, it bounces in the light. This will make your photography set look brighter. Shadows can be due to the angle of the walls. You should pay attention to that. The bulbs should be placed in such a way that they do not overshadow the walls.
Tip-2: Keep The Larger Lights
Keep the Larger lights for fewer shadows. The bigger your light, the lower the shadow. You can use micro-recessed lights for this. The light of micro-recessed light tends to be more pinpointed. If you want wider light, you can use it. You will find 6-inch wide lights in the market that can help reduce shadows during lighting.
Tip-3: Take Out Extra Furniture
Remove excess furniture in the photography set. Excess furniture is one of the causes of shadow. While large furniture cannot be removed, small furniture must be removed. Keep your bulbs in a position that does not shadow the furniture.
Tip-4: The Number Of Lights Should Be Increased
When you increase the number of lights, the shadow of the object decreases. More light greatly enhances indoor lighting. But you should set all the lights the same. Lights of different colors can create shadows. Also, the lights should be set at equal distances.
Tip-5:Use Bulbs Of The Same Watt
It would be better if the bulbs used in your room are of the same watt. Separate watt bulbs will create shadows on opposite sides.
Related Questions About Shadow Free Lighting:
What Type Of Lighting Reduces Shadows?
Three-point lighting is used to reduce shadows. The object is illuminated by three distinct lights. Three-point lighting consists of 3 lights
- Key Light:
The key light is the main light of three-point lighting. This light illuminates the whole object. The key light is next to the camera and at 45 angles from the object.
- Fill Light:
The fill light is on the side of the camera and the Key light is on the opposite side. The key light is used to create shadows. Fill light removes this shadow. This means that when using fill light and key light, both sides of the object are visible without shadow.
- Backlight:
The third source of three-point lighting is the backlight. Backlights are typically mounted on the back of the object. This light removes shadows from the object’s background.
How Do You Get Rid Of Background Shadows With Lighting?
During the lighting, avoid shadows as much as possible. Its continuation requires the removal of shadows from the background. You can do the following to get rid of shadow from the background during lighting.
- Lighting Positioning:
Focus on the object with the main light from the top in front of the object. In the same way, place the lights on the back as well as on the top. As a result, the background shadow will not be created. But you have to make sure you are in the right position. You can try several times to fix the correct position.
- Use Backdrop:
If your background wall is not perfect, a shadow may be created during lighting. You should use a backdrop to solve this problem. You can use a different color backdrop if you want. But I think a black backdrop is best for removing shadows during lighting.
- Distance From Backdrop:
Notice the distance of the backdrop from an object. Greater distance between the object and backdrop, less the shadow. Keep the camera away from objects. This reduces the shadow.
How To Avoid Shadows With Led Lights?
Sharp LED light creates more shadow. You need to use frosted LED bulbs. Frosted LED bulbs scatter light, resulting in less shadow. Use low-watt LED bulbs to avoid shadows. The low-watt light will spread more around.
By using LED bulbs of more watts, the light is concentrated. Also, one thing you should consider is increasing the number of LED lights. For this, you need to maintain a certain distance.
How Much Does It Cost To Buy Shadow-Free Lighting?
The quality of the accessories used in photography will be good. You will get a more shadow-free environment during lighting. An approximate price range of the accessories I have described above is in the table.
| Shadow-Free Lighting Accessories | Price Range |
| Lighting Reflectors | $15-$100 |
| Micro-Recessed Light(6-inch) | $15-$70 |
| Diffuser Lighting | $80-$200 |
| Three-Point Lighting | $300-$500 |
| LED Light | $30-$200 |
How To Get Rid Of Shadows With Lighting In Your Flat Lay Object?
To get rid of shadows, you can use the reflector during the lighting of the flat lay object. The reflector must be larger than your object. Reflector’s light bounces on the object. As a result, the flat lay object has no shadow. You will need to use a white reflector, such as Corflute Sheet.
By placing reflectors on both sides of the flat lay object, you will get a much better quality image. You can use a diffuser for the lighting flat lay object. The diffuser spreads the light. Diffusers of different colors are available. You can use any one that suits your object.
Why Are Shadows Created During Lighting?
When light falls on an object, you can see the object. If the light is obstructed by an object on its way, a shadow is created on the opposite side of the object. So shadow is created during lighting. To get rid of this shadow, there must be light on the opposite side of the object. And that’s why you have to use different bulbs, reflectors, and diffusers during photography.
Final Word:
How to get rid of shadows with lighting is not difficult for you anymore. But if you can’t arrange those materials, I have a special tip for you. That is to do shadow-free lighting using sunlight. You can take advantage of this when the sun is at 45-degree angles. Do photoshoots in such a way that there is even sunlight on both sides of the object.
Recent Posts
Do you think about building home theater columns yourself? It’s an effortless DIY project if you have basic knowledge and patience. A home theater column increases the visual appeal and audio...
Do you want to give your floors a sleek and resilient makeover without breaking the bank? The answer lies in Invincible Vinyl Flooring! Installing Invincible Vinyl Flooring is not just a practical...
3 thoughts on “How To Get Rid Of Shadows With Lighting? [Best Tips Ever]”